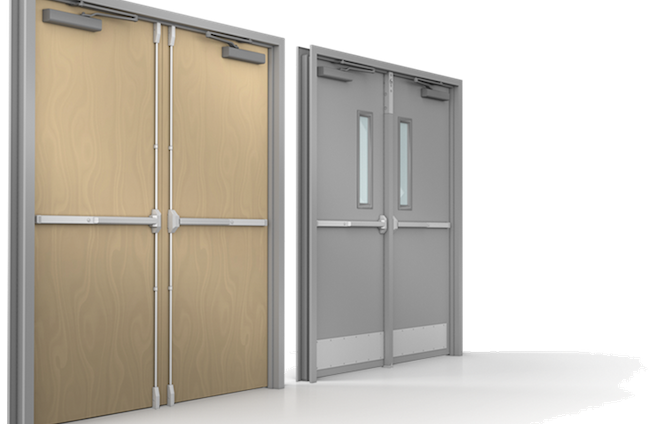
Starting with the frame
Whether you are manufacturing an airplane, automobile, skyscraper or submarine, it is necessary to begin with a quality infrastructure. A solid and accurate basis on which to start will lead to a better finished product. The same is true for the installation of doors. A quality door installation hinges on the accuracy and quality of both the wall construction and frame installation.
What most people think of as a problem with the door is more likely a problem with the frame in which the door is hung, or the wall in which the door is installed. It is of the utmost importance that the frame be manufactured, assembled, shipped and installed with care and craftsmanship. If instructions are followed and care is taken when the frame is set, installation of the door is a breeze.
Metal frames for steel doors are available in a variety of profiles for different wall types and installation requirements, some of which are flush frames, drywall frames, light gage frames and multi use frames. These frame types can be separated into two categories: frames that are set prior to wall construction and frames set after wall construction.
Although standards have helped alleviate many problems with interchangeability, it is often advisable to consider purchasing the entire door and frame package from one manufacturer if possible to minimize any problems of incompatibility or differences in tolerances.
Qualified installers should have no problem completing a quality frame installation job, despite the many variables it entails. Some programs are already in existence or being developed to train and certify door, frame and hardware installers. One such pioneering program is administered by the International Brotherhood of Carpenters and Joiners. These programs help trades people demonstrate their competency and ensure consistent results in the field.
Most of the problems encountered during steel frame and door installation can be avoided by following the manufacturer’s installation instructions, watching for potential trouble spots and taking steps to avoid them before they develop.
Masonry and other pre-assembled frames installed prior to or during the wall construction period require more care during initial installation, since their potential for quick and easy field repairs is limited. Access to the anchoring system in not available, making any changes or adjustments very difficult. Slip on drywall frames installed after the wall is built allow access to the anchoring system and are easily adjusted if necessary.
Because pre-assembled frames generally arrive at the jobsite and are installed well before the doors, some time may elapse before any problems are discovered. On many projects, masonry frames are often set during the early phases of construction. They may be grouted several months before the doors are installed, so an error in frame construction or installation may not be discovered until the mortar is long past the green stage. When the time comes to hang the doors and they don’t fit the frames properly, the job is too close to completion to be tearing out a frame or part of a wall.
Anchoring and bracing the frame
When welded frames are assembled, a temporary shipping brace or spreader bar is added to the bottom of the frame to prevent damage during transit. Because this temporary metal braces is only fastened across one side at the bottom of the frame, it does not protect against twisting or bowing of grout filled frames. Instead, full width wood or metal spreaders that span both rabbets of the frame should be used at the bottom as well as at the middle to maintain the door opening dimensions and help prevent the frame from twisting. Once the frame is properly installed, these spreaders can be removed.
When the frame is installed, it can be anchored in place in a number of different ways. Drywall frames are generally anchored with compression anchors. Masonry frames are usually secured with wire anchors, “T” anchors, or yoke and strap anchors. Wire loop anchors, typically formed of 7 gauge wire, can accommodate a variety of jamb depths and eliminate the need for several different anchors. “T” strap anchors, typically 18 gage steel, are designed for a specific jamb depth and are normally viewed as an alternative rather than a standard.
Frames installed in steel or wood stud walls can use a variety of anchor designs. Anchors may be lock in type, shipped loose with the frame for field installation or welded in at the factory or distributor’s facility. No matter what type of anchor is being used to anchor the frame, care should be taken when fastening the anchors to the stud or vice versa.
The critical step
The number of anchors used per jamb varies depending on the height of the frame. Typically, anchors should be installed immediately above or below each hinge reinforcement on the hinge jamb and directly opposite on the strike jamb. Refer to the manufacturer’s instructions for recommendations concerning the specific number and placement of frame anchors.
A few more details
Before the frame is installed, aligned and anchored, a few final details should also be checked. Electrical hardware and some door closers require a few precautions at the frame installation stage. Be sure there is enough space for an electric strike if specified. If an electric power transfer is called for, be sure any needed wiring can be installed. This is particularly true of frames that will be grouted, making future wiring difficult. Also, be sure there has been enough room allowed for products such as concealed closers, which may require additional headroom above the frame.
Strike installation can come later, when the doors are installed. If the wall is built plumb and the frame is set properly, the door should be able to be hung with minimal adjustments and make for a long lasting, functional opening.